October is here, the leaves are changing colors, the weather is cooling off and pumpkin spice is everywhere. My door however was looking mighty bare. I had a ton of twine left over from some of the DIY projects I had done for my upcoming wedding. So, I decided to make a wreath with all of the leftover twine I had sitting around!
MATERIALS
- 14″ floral ring – purchased as a 3 pack through amazon https://amzn.to/2LUiykp
- Jute twine https://amzn.to/35kSC9w (this is a great price! Under $4 for 328 feet!)
- Hot Glue Gun and Glue
- Fall Ribbon
- Your favorite embellishments, I found a cute dupes for the welcome sign that I used on amazon (Linked Below) – go walk around your local craft / dollar store and pick up what screams out to you. This is the best part of making your own wreath you get to be as creative as you’d like!
- https://amzn.to/2IuubfO
STEP 1: braid the twine
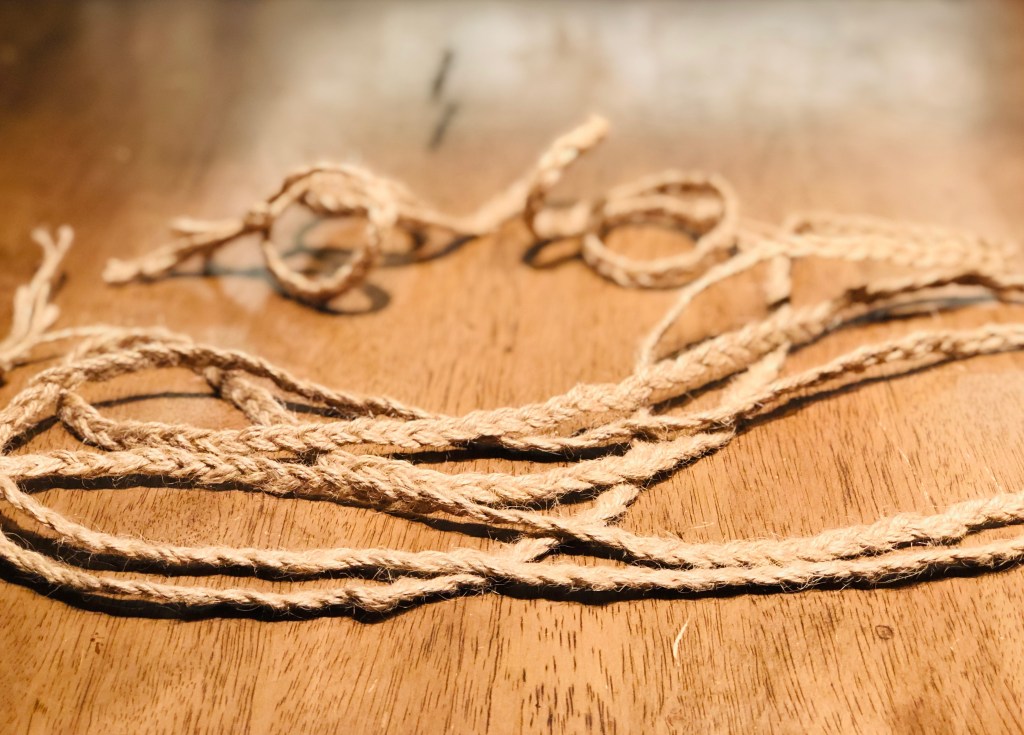
Cut 3 pieces of twine equal in length, tie a knot at the top and start to braid. Once you reach the bottom, tie a second knot and start on a new piece. Depending the size of your ring will determine how much “braid” you need. I needed to braid 3 double arm lengths of twine to wrap mine, thats a wholeeee lotta twine but it was well worth it after seeing the final look.
TIP : I chose to add and an extra element and depth to this fall wreath, which is why I braided the twine together before wrapping the wreath ring. If you’d like to make this a quicker DIY project you can wrap the twine around the ring without braiding it and will come out just as beautiful!
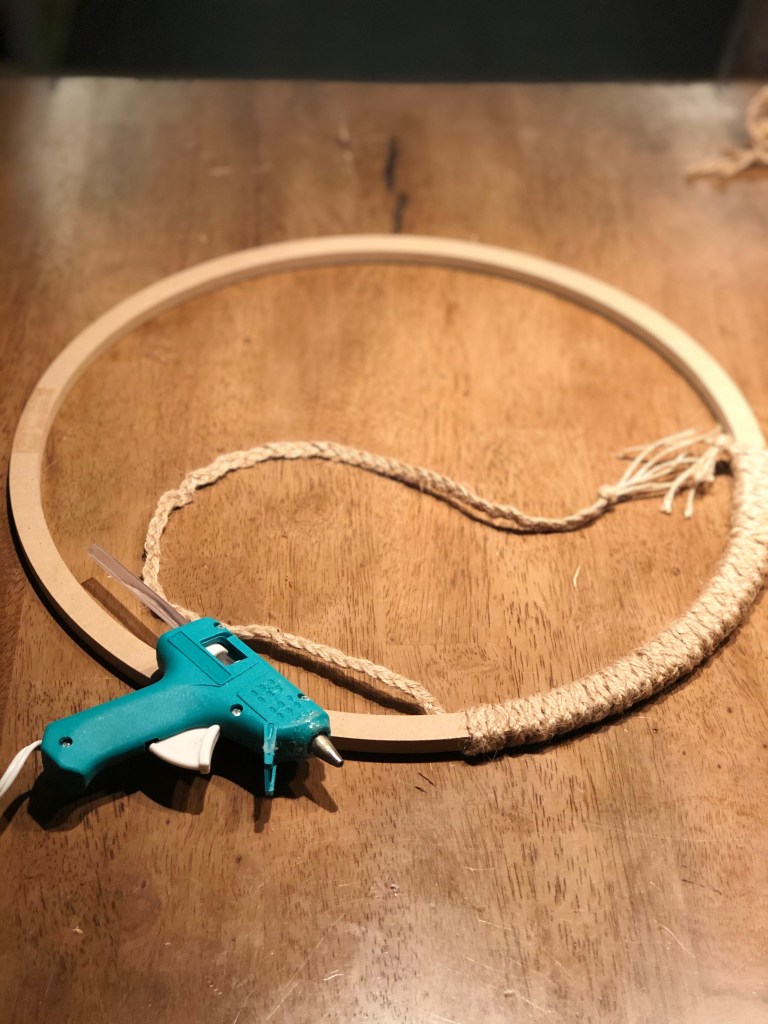
STEP 2: wrap and glue
As I was sitting at the table wrapping and gluing, my fiancé says to me… “you have the patience of a saint.” With crafts YES, there is something therapeutic about creating something from scratch and seeing the final product is so very exciting! But catch me at 3 am when my cat is running around the house, knocking things off the night stand waking up our 1 year old puppy and those patience are no where to be found! I love my animals but this girl needs her sleep!
Anywhoooo back to step 2 – take the braided twine and wrap it around the wreath, gluing every other wrap. Make sure you glue to the same side of the ring so everything looks cohesive. The knots on the end of the braids should be cut off but make sure you glue the ends together so they do not peel. These ends should be glued to the back side of the ring so that nothing is showing in the front.
STEP 3: Fill ‘er up!
This is the fun part. Take any embellishments that you choose or have handy around the house and fill up the wreath to your liking! You can use ribbon, leaves, flowers, pumpkins, words etc. There are so many options not every one has to be the same!
I had a welcome sign lying around the house that I haven’t used in years and it was the perfect fit! I started with that, decided where I wanted the welcome positioned on the wreath and worked around it. I made a bow from a roll of ribbon I bought at dollar tree and I filled it all in with some fall flowers and leaves

After all of my embellishments were dry fitted and I decided on the lay out, I started to glue, glue, glue! Always remember, sometimes less is more!

